
Walk into the unfinished basement or raw attic of an older or mid-century home, and the initial impression is rarely one of domestic comfort. In the lower level, cold concrete slabs sit beneath exposed floor joists, tangled plumbing runs, and spiderweb-draped ductwork, accompanied by the distinct mineral scent of subsurface dampness. Overhead, the attic presents a cavernous geometric triangle of bare roof rafters, drifting fiberglass insulation, extreme temperature swings, and protruding roofing nails. For many property owners, these areas function merely as dead storage zones, crowded with cardboard boxes, holiday decorations, and discarded furniture.
Transforming these raw spaces into enduring living areas demands an engineered conversion framework. Homeowners must respect building science, prioritizing geotechnical moisture mitigation, structural load paths, thermal boundary design, dedicated environmental zoning, and fire-safety egress before finalizing interior finishes. When executed with precision and disciplined sequencing, these conversions unlock valuable living space that remains structurally sound, quiet, dry, and code-compliant for generations.
1. Stabilizing Subterranean Moisture, Footings, and Exterior Ground Drainage
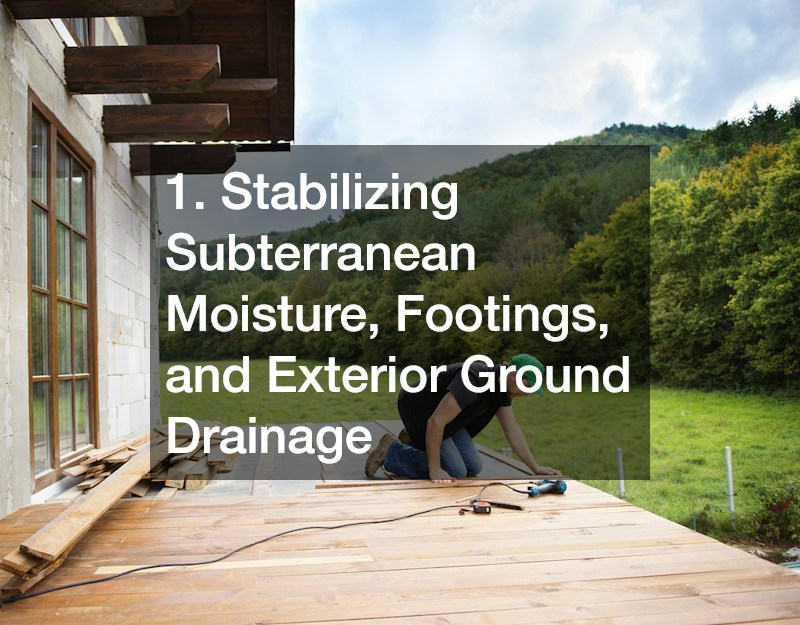
Before framing a single interior partition or laying subflooring across a subterranean basement slab, you must solve the building physics governing below-grade structures. Concrete is inherently porous; it behaves like a hard sponge, continuously absorbing soil moisture through capillary action and releasing water vapor into the interior air. In unconditioned basements, this moisture often evaporates harmlessly into the open space or vents through drafty rim joists. But once that concrete is sealed behind framed stud walls, fiberglass insulation, and paper-faced gypsum drywall, trapped vapor generates mold blooms, rots wood framing, and produces musty indoor environments.
Establish Sub-Slab Egress Wells and Relieve Foundation Soil Pressures
Achieving legal code compliance in a finished basement requires adhering strictly to the emergency escape and rescue opening regulations mandated by the International Residential Code (IRC Section R310). Any finished room designated for sleeping, or any large habitable space, must feature at least one operable emergency escape opening leading directly to the outdoors. Because basement window openings are usually small, drafty hopper windows tucked into the mudsill, homeowners must cut deep into structural concrete walls to create an egress portal providing a minimum net clear opening of 5.7 square feet, with a minimum clear height of 24 inches, a minimum clear width of 20 inches, and a maximum interior sill height of 44 inches from the finished floor.
Executing this structural alteration safely demands heavy earth-moving equipment and specialized foundation cutting:
- Excavate Deep Window Well Enclosures: Hand digging a five-foot-deep pit next to a foundation wall is both dangerous and inefficient. Mobilizing a professional local excavation company ensures the trench is cleared safely down past the footing level, preventing trench collapses and protecting buried underground utility lines.
- Install Reinforced Corrugated or Composite Window Wells: The soil surrounding the new window opening must be held back with heavy-gauge corrugated galvanized steel, pressure-treated timbers, or structural composite modular well units securely anchored directly into the foundation masonry with concrete wedge anchors.
- Water-Seal the Masonry Exterior: Once the foundation is exposed, scrape away residual dirt and apply an elastomeric rubberized asphalt waterproofing membrane across the exterior face of the wall. Overlay this with a dimpled high-density polyethylene drainage board, creating an air gap that channels trickling groundwater harmlessly down to the footing pipes before it ever reaches the cold joint.
Direct Surface Runoff Away from Below-Grade Living Enclosures
Subsurface waterproofing systems are only the secondary line of defense; the primary strategy must always focus on diverting stormwater before it enters the soil adjacent to the foundation. When rainwater sheets off the roof and pools along the foundation wall, it creates severe hydrostatic pressure. This water pushes through microscopic hairline cracks, migrates through cold joints between the footing and the wall, and causes unbonded slab moisture issues that ruin interior flooring installations.
Correcting site hydrology and creating defensive landscaping involves several critical steps:
- Re-Establish Positive Surface Slope Contours: Strip away old landscape beds, decaying wood mulch, and settled topsoil sitting directly against the home’s exterior siding. Re-grade the perimeter to create a positive slope away from the home, maintaining a minimum drop of six inches over the first ten horizontal feet.
- Partner with Experienced Ground Teams: Collaborating with seasoned landscape installers enables the construction of integrated dry creek beds, swales, and vegetated bio-retention zones designed to catch heavy surface runoff and direct it around the foundation perimeter toward safe street-level discharge points.
2. Hardening the Roof Envelope, Rafter Assemblies, and Attic Thermal Barriers
At the opposite end of the home, transforming an attic into code-compliant living space presents an entirely different set of structural and environmental challenges. Unlike basements, which benefit from the thermal buffering of surrounding earth, attics endure the full brunt of atmospheric extremes. In mid-summer, radiant solar energy can heat attic roof sheathing past 150 degrees Fahrenheit, turning uninsulated attic rooms into stifling ovens. In winter, escaping interior heat combines with cold exterior air to generate condensation, frost, and destructive ice dams along the eaves.
Reconfigure Overhead Roof Decks for Extreme Thermal and Weather Resistance
Traditional attic framing relies on two-by-four or two-by-six dimensional rafters designed solely to support roof sheathing, shingles, and lightweight snow loads. These framing members are rarely deep enough to accommodate the high R-value insulation (typically R-38 to R-49) required by modern energy codes for finished living roofs. Furthermore, existing horizontal ceiling joists serving as the attic floor are often undersized two-by-sixes engineered only for tensile roof-tie strength and dead-storage loads, rather than the thirty to forty pounds per square foot live-load capacity required for finished living space.
Upgrading overhead roof structures to handle human occupancy requires careful engineering:
- Sister Joists and Stiffen the Floor Diaphragm: Reinforce the existing attic floor framing by sistering deeper dimensional lumber or engineered lumber alongside existing ceiling ties. Fasten these members using structural construction adhesives and through-bolts in an engineered pattern to prevent floor bounce and ceiling cracks below.
- Upgrade to a High-Performance Metal Roof Assembly: When stripping aging shingles to prepare for an attic conversion, investing in a commercial-grade metal roof installation provides unmatched thermal reflection and weather protection. Standing-seam metal profiles reflect solar radiation back into the atmosphere, reduce summer cooling loads in the finished attic, easily shed heavy snow, and provide a five-decade weather barrier that prevents leaks from ruining newly finished plaster and drywall.
Illuminate Exterior Access Paths, Dormers, and Stairwell Portals
Creating code-compliant access to converted spaces is an essential aspect of project planning. The building code prohibits steep, narrow alternating-tread stairs, pull-down ladders, or spiral staircases with small radii as primary means of egress. A legal staircase must provide a minimum clear width of 36 inches, a maximum riser height of 7.75 inches, a minimum tread run of 10 inches, and a continuous handrail mounted between 34 and 38 inches above the tread nosing. In many layouts, fitting an interior staircase into an existing floor plan consumes too much main-floor space, leading homeowners to build exterior staircases or private entrances for rental suites or guest rooms.
Equipping access portals and stairwells with proper lighting involves specific safety protocols:
- Illuminate Exterior Egress Pathways: Exterior staircases leading to private upper-level attic entrances or walkout basement bulkhead doors require comprehensive lighting. Contracting licensed electricians for wet-rated exterior lighting installation ensures that all stair risers, landing platforms, and walkways are illuminated by code-compliant fixtures, eliminating shadows and tripping hazards during inclement weather.
- Provide Hardwired Emergency Egress Illumination: In larger conversions featuring multi-room layouts, install hardwired battery-backup emergency egress lighting fixtures that activate automatically during municipal power outages, lighting pathways to exterior doors and window wells.
3. Engineering Indoor Climate, Dedicated Ventilation, and Domestic Hot Water
A newly converted space will remain uncomfortably drafty or humid if the mechanical systems cannot handle its distinct environmental demands. Tapping into an existing main-floor heating and cooling system is a frequent point of failure in DIY renovations. A furnace and air conditioning condenser sized specifically for a home’s original square footage lack the heating capacity and fan static pressure needed to push conditioned air into an attic peak or pull return air out of a subterranean basement. Splicing into existing ductwork results in an overworked HVAC system, loud registers, high utility bills, and chronic temperature imbalances.
Zone Dedicated Microclimates with Ductless Heat Pumps and Dehumidification
Basements and attics sit at opposite ends of the residential thermal spectrum. Basements have low sensible cooling loads because they are buffered by the cool earth, but they suffer from high latent loads (elevated humidity). Attics experience massive sensible heat gains through the roof in summer and rapid thermal heat loss in winter. Attempting to condition both environments with a single central thermostat leads to continuous comfort complaints.
To engineer stable, energy-efficient microclimates in these spaces:
- Specify Inverter-Driven Ductless Mini-Split Heat Pumps: Consult a certified ac company to perform separate ACCA Manual J heating and cooling calculations for the converted space. Installing independent, multi-zone ductless mini-split systems allows you to set customized temperatures in attic master suites and basement media rooms without altering the main-floor climate settings.
- Insulate Ductwork Passing Through Unconditioned Spaces: If choosing a ducted mini-split heat pump system with distribution trunks tucked into unconditioned attic eaves, wrap all sheet metal and flexible duct runs in a minimum of R-8 foil-faced insulation. Seal every connection and collar with fiber-reinforced liquid mastic paste to stop conditioned air loss.
Upgrade Mechanical Plumbing Trees for Added Bathrooms and Utility Runs
Adding bathrooms, wet bars, or laundry rooms to converted spaces requires re-evaluating domestic water supply lines, drainage fixtures, and water heating capacity. In an attic, plumbing runs must navigate existing floor framing without notching joists beyond allowable structural limits. In a basement, all plumbing fixtures sit below the elevation of the municipal sewer line or septic tank inlet, meaning wastewater cannot drain away by gravity alone.
Implement these plumbing upgrades to keep waste lines flowing and water running hot:
- Upgrade to High-Efficiency Tankless Domestic Water Heating: Adding bathrooms to converted levels places heavy demands on standard forty-gallon storage tank heaters. Completing a tankless gas or electric water heater installation supplies endless on-demand domestic hot water, takes up zero floor space in small mechanical rooms, and cuts standby energy loss.
- Protect Water Supply Lines from Freezing: Attic supply plumbing running through exterior knee walls or unconditioned roof eave zones must never be placed on the cold side of building insulation. Run PEX water lines along interior partition walls, enclose them within heated chase spaces, and insulate all piping with closed-cell elastomeric foam sleeves.
4. Remedying Sub-Slab Moisture, Water Quality, and Flooring Deflection
Finished flooring in an attic or basement is subject to structural and environmental pressures rarely seen on standard middle floors. Downstairs, concrete sub-slabs sit directly over damp soil, sweating moisture vapor upward that dissolves adhesives, cups wood flooring, and rots organic materials. Upstairs, long, flexible attic joists deflect and bounce under foot traffic, causing rigid ceramic or stone floor tiles to crack and grout lines to crumble. Resolving these challenges requires auditing supply water quality, measuring concrete moisture, and decoupling finished flooring assemblies.
Neutralize Mineral Scaling and Protect Sensitive Below-Grade Plumbing
When extending plumbing systems into remote living areas, supply water chemistry becomes a primary concern. Municipal tap water and private wells often carry dissolved minerals like calcium, magnesium, and iron. In unconditioned basements, fluctuating temperatures cause these minerals to precipitate out rapidly, clogging modern low-flow shower cartridges, scaling up tankless water heater heat exchangers, and leaving stains on glass shower enclosures and ceramic fixtures.
To protect plumbing investments and fixtures throughout the home:
- Audit Water Chemistry with Professional Laboratory Panels: Before tying new fixtures into the water main, pull a sample to test for total dissolved solids (TDS), grains per gallon (GPG) of hardness, iron content, and pH balance. Hardness exceeding seven grains per gallon calls for mechanical conditioning to protect plumbing lines and appliances.
- Install High-Capacity Conditioning Systems: Contracting certified technicians for local water softener installations ensures the water system is properly sized to handle the added fixture counts of new living spaces. Ion-exchange softeners remove dissolved calcium and magnesium ions, protecting water lines, mixing valves, and luxury plumbing fixtures from scale buildup.
Install Vapor-Barrier Subfloor Systems Before Laying Finished Planks
Placing finished flooring directly over a basement concrete slab is a recipe for long-term failure. Even if a slab appears dry to the touch, moisture continuously diffuses through the concrete as invisible water vapor. Laying carpet, engineered wood, or solid hardwood over bare concrete traps this moisture beneath the backing. Within months, adhesives fail, wood planks cup, and mold develops in the subfloor materials.
Prepare the subfloor with these moisture and structural isolation techniques:
- Account for Humidity Fluctuations with Engineered Planking: Solid three-quarter-inch hardwood expands and contracts significantly across seasonal humidity swings, making it unsuitable for below-grade installations. Partnering with skilled hardwood floor installers ensures you select high-dimensional-stability engineered hardwood featuring a thick real-wood wear layer over multi-ply birch cores, installed with wide expansion gaps around room perimeters.
- Reinforce Attic Floor Deflection for Tile Installations: Natural stone, marble, and large-format porcelain tiles require a floor deflection rating of L/720–twice as stiff as the standard L/360 rating allowed for carpet. When tiling attic bathroom floors, sister existing floor joists, glue and screw down a minimum three-quarter-inch subfloor, and install an uncoupling membrane to prevent floor deflection from cracking tile and grout.
5. Designing Code-Compliant Kitchenettes, Wet Bars, and Structural Solid Surfaces

Converting an attic or basement into a self-contained accessory dwelling unit (ADU), guest suite, or entertainment space frequently involves adding a kitchenette or wet bar. These installations elevate the space’s usability and rental value, but they introduce strict building and electrical code requirements. Municipal zoning boards differentiate sharply between a simple wet bar (small bar sink, mini-fridge, limited counter runs) and a full secondary dwelling unit (equipped with a full 240-volt electric range, full-sized sink, and separate cooking equipment). Crossing this line without proper permits, egress planning, and dedicated utility metering can result in municipal stop-work orders and significant fines.
Optimize Compact Cabinetry and Dedicated Electrical Service Lines
Working within the unusual geometry of raw spaces requires thoughtful layout planning. Basements feature low drop ceilings, structural steel support columns, and boxed-out ductwork chases that interrupt cabinet runs. Attics present low knee walls and steeply pitched ceilings that eliminate room for traditional wall-hung upper cabinets. Creating functional, code-compliant storage requires tailored spatial planning and dedicated electrical distribution.
To optimize these spatial challenges while meeting National Electrical Code (NEC) rules:
- Maximize Irregular Geometry with Custom Cabinetry: Collaborating with professional kitchen designers enables homeowners to turn awkward spaces into functional assets. Designers can create custom-depth base cabinets, pull-out pantry towers that fit low attic knee walls, and recessed storage nooks between basement wall studs, maximizing storage without crowding the room.
- Integrate Under-Cabinet and Task Lighting: Low ceilings and angled walls often block overhead ambient light fixtures. Install low-profile LED tape lighting or recessed puck lights underneath shelving and hanging cabinets to illuminate food prep surfaces, running wiring behind access panels for future maintenance.
Anchor Solid Stone Surfaces Over Reinforced Cabinetry and Framing
Once cabinetry and plumbing runs are in place, selecting and installing countertop materials brings the conversion to life. While budget laminates or lightweight butcher blocks are simple to handle, high-end conversions favor natural granite, quartzite, or engineered quartz. These stone materials deliver exceptional durability, scratch resistance, and aesthetic value, but they present concentrated dead loads that require structural support.
Ensure long-term durability when installing solid surface countertops:
- Hire Professional Field Crews for Complex Access: Transporting a multi-hundred-pound slab of quartz down a tight basement staircase or up a narrow attic flight presents significant injury and property-damage risks. Engaging professional countertop installers ensures large slabs are templated using laser digitizers, cut into manageable sections with discrete seam placements, and moved using specialized lifting equipment.
- Seal and Maintain Natural Stone Porosity: While engineered quartz is non-porous and needs no chemical sealers, natural materials like marble, granite, and quartzite absorb liquid spills. Apply a food-safe, fluoropolymer-based penetrating impregnator to seal porous stone surfaces, keeping wine, coffee, and oils from creating permanent stains in secondary kitchenettes.
When you take the time to build this essential physical foundation, the investment pays continuous dividends. You gain a quieter, more functional home, lower overall utility bills, and the lasting assurance that your finished space is safe, legal, and built to stand the test of time.